~Motion Memory Blog~
As camera enthusiasts, we get bad FOMO (the Fear Of Missing Out) when we go anywhere exciting without our cameras. So more often than not, the camera comes with us. But as I’ve traveled with my camera gear over the years, I’ve discovered that it’s not always an easy ordeal. There are many things to consider – which I find myself considering again, as my wife and I are about to leave for our 10-year anniversary trip. So, walk with me down this road (pun intended) of travel photography.
The first thing you need to consider is what kind of photography you’re likely to do on your trip. Sometimes this is an easy question: like when you’re traveling to film or photograph a wedding. Other times, it’s more up to your personality and the tolerance of your travel companions. My upcoming trip happens to be a five-day cruise to Mexico leaving from New Orleans. Most of the photography will be casual and more akin to snapshots; however, each time I go on vacation, I set aside time to take that “perfect picture”. I get a little artsy and thankfully my wife understands that I’m a crazy person. This time, I even plan on trying to document our trip with videos.
If you don’t plan on taking any artsy photos, you can likely get away with your cell phone! As blasphemous as it sounds, modern cell phones are equipped with three or four built-in lenses, and can do just fine during your travel. Plus, cell phones are more than adequate for VLOGs too.
If on the other hand, you’re going to haul your dedicated camera with you, you need to decide which lenses to bring. If hand-held travel blogging is your style, you’ll need a wide lens. If you plan on more portrait-style shots, you’ll need a longer lens. But the sweet spot may be the ever versatile 24-70 standard zoom. 24mm is just wide enough for handheld video (although you won’t get much context around your face). 70mm is long enough to start to get some quality background separation for portraits. Everything in between is icing on the cake!
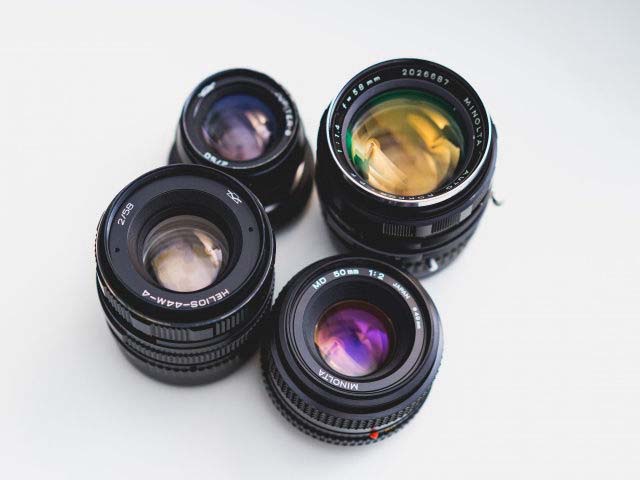
Of course, a standard zoom is likely to have an f4 or f2.8 aperture at most. If you’re addicted to fast primes, you may feel compelled to bring multiple chonky (the scientific term) lenses. For your own sanity, take a look at your lens selection and pick a variety of no more than three. Unless you have particularly light lenses, choosing more is going to weigh you down both physically and with the mental decision of choosing your lens every time you go adventuring from your room.
My personal recommendation is to bring a wide zoom – in my case, the Tamron 17-28 f2.8 – and a longer lens. If you need an even closer look, check to see if your camera has a crop mode – sometimes called “super35” or “APSC” mode. The wide zoom is versatile for selfies, blogging, and landscapes. The f2.8 will let in enough light in most dark areas, but you can stop down for your landscapes. Finally, bringing at least one fast prime (whether it’s 50, 85, or 135) can let you take those magical portraits that will make your vacation seem magical. My current favorite portrait focal length is the 85mm!
Some of you are undoubtedly feeling the need to bring a tripod – and who could blame you? Long exposures, self-portraits, stable video! But a tripod is one of the bulkiest items you can haul around. Travel tripods are typically more compact and relatively light weight but come at the expense of height and … expense. An often-overlooked alternative to the travel tripod is the monopod. While it’s not a magic bullet like a tripod, a monopod can steady your camera significantly. Some monopods even have small feet that can make it stand (if your anxiety can bare it). Their diameter is typically much slimmer than even a travel tripod, but their length (even collapsed) can be much longer than the typical travel tripods on the market.
The most compact tripod is a mini tripod. Standing just a few inches tall, a mini tripod can be stable but necessitates an elevated surface to get to eye-level. Finally, if you’re not pointing the camera at yourself, you can always use technique to keep your photos steady – bracing your arm on a table, rail, or wall will do wonders for reducing camera shake.
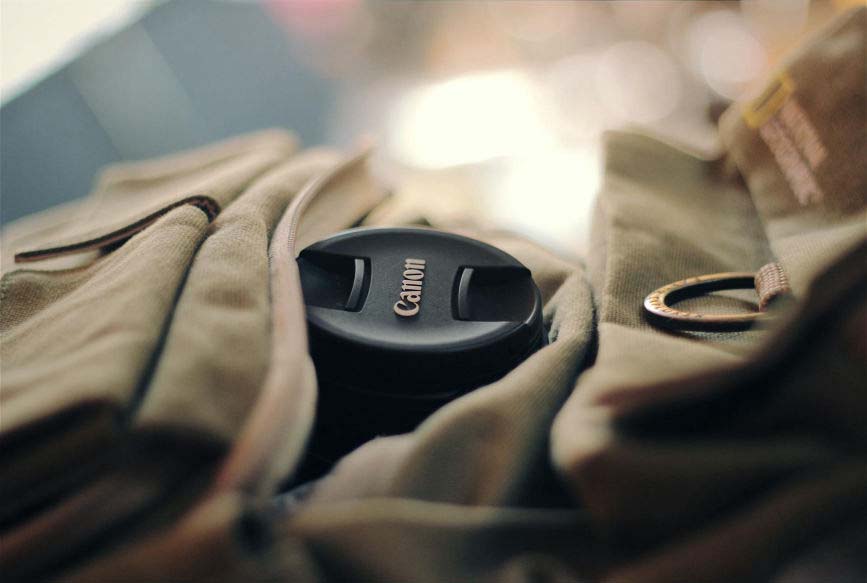
Whenever you’re traveling, protecting your gear is top priority. I always advise that you use a dedicated camera bag. Those come in all shapes and sizes – sling bags, backpacks, or “camera bags”. Sling bags are the lightest option but carry very little. That limitation can work to your benefit, however, as it will force you to be selective in your gear choices.
Backpacks are convenient and can hold your entire kit! They’re also perfect for hiking or city exploration, as they come with sturdy straps and don’t draw as much attention. Specialized camera backpacks often come with security measures and customizable compartments for your gear. Best of all, backpacks can generally support other daily items – a change of clothes, water bottle, etc.
Finally, you’re going to want to forego the traditional “camera bag” unless absolutely necessary for business purposes – and if you’re carrying that kind of equipment, I might recommend a hard-shelled case, like a Pelican case or knockoff. Otherwise, large camera bags are unwieldy and draw more unwanted attention.
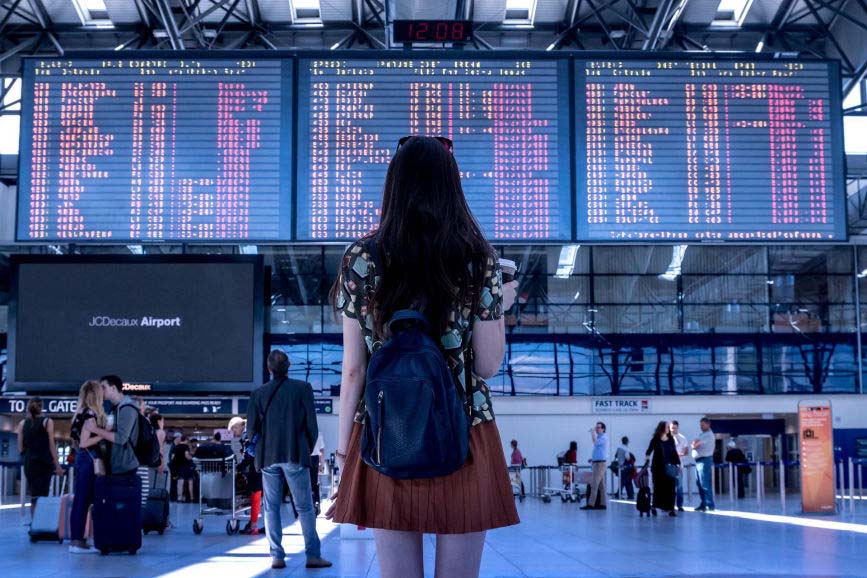
There are few things worse in life than dealing with TSA security at the airport, but like most things in life, not all TSA security checkpoints are the same. I typically travel lighter, but I flew to Illinois to film a friend’s wedding in the fall of 2020. When I left through BNA-Nashville airport, the TSA made me open my camera backpack, remove each lens and camera body separate. It was an ordeal. On the way back home through St. Louis, the TSA was much easier to deal with. The agent said, “That backpack is a camera bag, just unzip it.” So I did, they looked, poked their stick down in there, and let me go on. EZPZ!
If you take nothing else from this blog, remember this: Never leave your camera equipment in the car. Never leave your camera equipment in the car. Never leave your camera equipment in the car.
But also, watch your bags carefully at the airports, train stations, and bus stops. Stealing camera gear is a real problem in tourist areas. Opportunists know exactly what kind of bags are likely to be holding electronics and camera gear.
Never check your camera gear! The way that luggage is handled on planes is appalling. Nothing could be worse than arriving at your destination and having a broken lens or camera! Make sure that your bag meets FAA regulations for carryon items and explain, if questioned, that you have to take your camera on with you, because it is sensitive and contains batteries (as lithium-ion batteries cannot be checked).
While you can invest in certain anti-theft devices, most thieves know what these devices look like and how to get rid of or disable them quickly. If you’re going to use an Air Tag or Tile, do your best to make it difficult to remove or conceal it inside your bag. I’m hopeful that the next generation of camera will have anti-theft technologies built in. It will also go a long way to document your camera bodies and lenses. Makes sure to note the brand, model, and even serial number. There are apps that can handle this for you, like My Gear Vault.
Hopefully this has helped you in your travel photography planning. Remember to pack smart, plan ahead, and from time to time, consider putting the camera down. (Oh and always put sunscreen on your ears!)
- Shawn